Check-in Guide
ESLEAD HOTEL has introduced a self check-in system using tablets.
You can check in quickly by registering your information before your stay.
This page provides information on how to pre-register before your stay and how to check-in on the day of your stay (with video).
*Check-in methods vary depending on the accommodation facility.
How to pre-register before staying
Access the pre-registration URL in the guidance email
After completing your reservation, you will receive a guidance email containing the URL for pre-registration to your registered email address. Access the URL provided. Once accessed, you can log in to My Page.

Select language and enter guest information
Select your language and follow the instructions to enter guest information (nationality, name, date of birth, email address, phone number, current address).

Upload passport image
Upload the passport image you took and complete pre-registration. Japanese people do not need to upload a passport image.

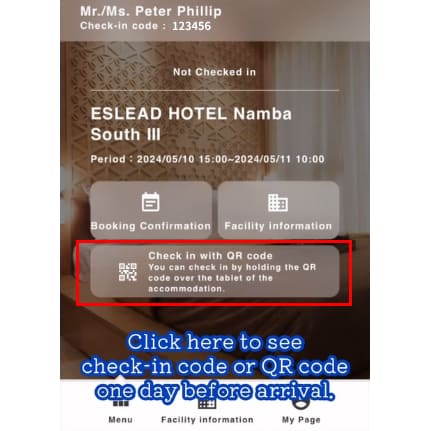
The check-in code and 2D code will be available for display the day before check-in.
When checking in, you can choose to “enter check-in code” or “scan 2D code”.
The check-in code and 2D code will be displayed by tapping the red frame on this screen.

Check-in method
(ESLEAD HOTEL Namba South III, Osaka Tsuruhashi, Namba Daikokucho)
Please prepare the check-in code or 2D code obtained during pre-registration. The check-in code and 2D code will be displayed by tapping the red frame on this screen.

Select language and start check-in
When you arrive at the hotel, select your language on your tablet and tap “Check in”.

“Enter check-in code” or “2D code scan”
Tap “Enter check-in code” or “Scan 2D code” and enter the check-in code obtained during pre-registration, or Display and scan the 2D code.

Check reservation details and guest information
Reservation details and guest information will be displayed in order, so proceed while checking them.

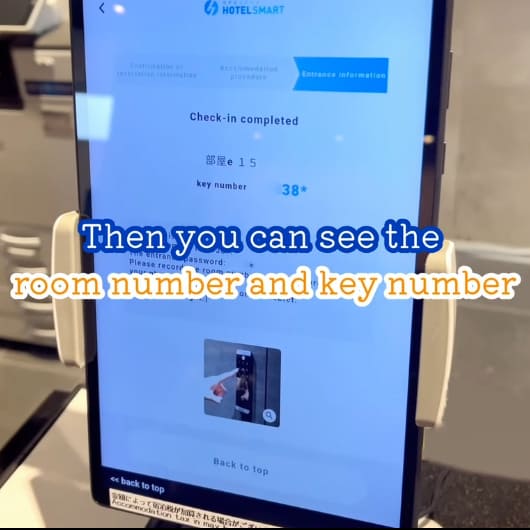
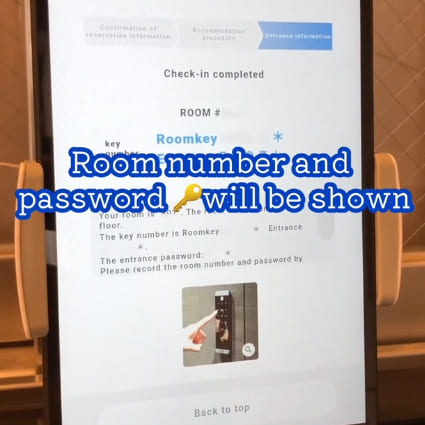
Keep your room number and room key number handy
Finally, your room number and room key number will be displayed, so take a photo or take a note and save it to complete your check-in.

We also provide video instructions from pre-registration to check-in.
Check-in method
(ESLEAD HOTEL Osaka Ebisu, Osaka Nipponbashi, Namba South II, Namba Ebisu West, Namba South I)
Please prepare the check-in code or 2D code obtained during pre-registration. The check-in code and 2D code will be displayed by tapping the red frame on this screen.

Select language and start check-in
When you arrive at the hotel, select your language on your tablet and tap “Check in”.

“Enter check-in code” or “2D code scan”
Tap “Enter check-in code” or “Scan 2D code” and enter the check-in code obtained during pre-registration, or Display and scan the 2D code.

Check reservation details
The reservation details will be displayed, so confirm them and proceed to the next step.

Sign hotel policy
Hotel policies will be displayed, so please review them and sign to proceed.

Check guest information
Guest information will be displayed, so check it and proceed to the next step.

Verify your identity by talking to an operator
When the screen to connect to the operation center appears, select the language of the operator, tap the “Start” button, and confirm your identity by speaking with the operator.

Keep your room number and room key number handy
Finally, your room number and room key number will be displayed, so take a photo or take a note and save it to complete your check-in.

We also provide video instructions from pre-registration to check-in.
- TOP
- Check-in Guide
